 Yesterday, I posted about using Storyline Articulate 360 to create a drag and drop scenario for a class on the brain I am working on. Today, I want to share another method I used to make the information more interesting. The software is Sparkol VideoScribe. I’ve posted about it in the past (2 years ago) but wanted to write an update and show how I created the project.
Cost: the software costs $168 per year or $35 if you pay per month. You may also buy a lifetime copy for $800. If you work in education, be sure to ask for an education quote. It is worth checking into.
VideoScribe is a quick download and has a wonderful blog that you can is very helpful, including responding to specific questions you may have. The software is updated regularly and relatively easy to use. They have addressed several issues since I first used the software, so they are regularly improving the program, which is a good sign for longevity.

The program is considered a “white board video” program (see my production above). This means the background is a white board and a hand/arm/pen is used in the production, creating the feeling that you are watching someone write or draw. This tells the brain to pay attention, which is a good thing for your memory. You have lots of arm/hand/pens to choose from and erasers to remove writing/drawings. It is quite realistic, in fact, the first one I showed to staff caused someone to remark, “Gee, I didn’t know Faye could draw!” The others response was, “Well, she went to art school.” They were both amazed when I showed them how it was created.
The project I worked on was one I created last year that needed some improvement. I found the voice-over to be of poor quality, so I decided to re-record it. You can record directly into the program, but there is no editing of audio in the program, so you need to redo it if you have issues. You can watch the video part as you speak to help with timing, but I (and the creators as well) suggest using an outside program to create the audio. The creators also suggest creating the audio first and then building the presentation to go with the audio. This is sound advice, but it doesn’t work with my brain. I need to build the presentation first and then add the audio. Do whatever works for you. There is no right or wrong way to do it, only what works for you.
Audio: I wrote out the script while listening to the presentation. This was a pain and probably could have been done easier simply by watching the production and writing a new script. Live and learn. 😊 I used Audacity, which is my go-to audio software. It hits the trifecta of software – it is free, does a wonderful job and is easy to use! If you don’t have it, download it and check it out. Hint: if you want more information about Audacity and sound in general, look at my blog post, Express Yourself with Sound.
 Audio and Timing: Once I created the voice over, I opened the original VideoScribe document. When I first used the program, if you had a voice-over and wanted to change it, you had to place the new one on top of the old one. This wasn’t super difficult but wasn’t exactly fun to do if your timing was different. People complained and they fixed it. Now, click on the audio button and it brings up the voice-over screen. There is a trash can. Click the trash can to remove the current audio. Then, click on the upload button and insert your audio. Play the presentation to see how it fits. You may need to go back to the original and add silence, remove, silence, etc. to make it fit just right. It can be a bit time consuming, but worth it if you want a professional quality production.
 Add Scenes/Images: If you are starting a new project, or want to add additional scenes, click on image, text or chart to the right of the film strip. You may upload your own images (SVG is recommended) or look online or in the library. There are some free images available, but I generally add my own. Put the image where you want it on the screen. Set camera to location, that way, when it draws the image, you have the view you want. You will probably change it multiple times, but it’s easier to change later if you set it up as you go. You can set the timing of the drawing, but I like to add everything first and time all at once after. Use whatever works best for you. Whatever you choose, the drawing time should look as natural as possible. The first time I did it I sped up the drawing time to match the audio and it looked like a printer gone wild rather than a hand sketching, LOL.
 Drawing Instrument: You will also want to choose your hand. They have male, female and many different skin color options. You may also want to use just a drawing instrument without a hand. I like the hand myself as it seems more natural. I also move the camera to zoom in on what I’ve added rather than wipe out/erase. Sometimes though, I will use a hand and/or eraser to remove text/images. Its fun to change it up, so have some fun.

 Background Music: Sparkol has a lot of background music to choose from. Click on the music note button to check out the options. I tend to go for the light, unobtrusive background music. You can do without it but it ads a nice touch. Just be sure to keep the level low if you have a voice-over so there isn’t a competition between the two. You should be able to easily hear the voice-over. All you need to do is set the slider on the background music to about 25%. Listen to the whole presentation before publishing to be sure it works well.
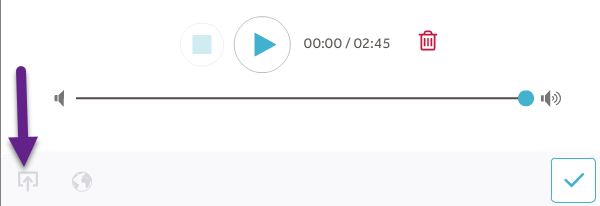
Publish: Once you have it all set, click the publish button on the top right. You can save the video to your computer or publish it online. I tend to do both. Sparkol VideoScribe allows you to post on sho.co for Sparkol and gives you the link and/or embed code. Once you publish, share it with your audience. I’m sure they will enjoy the change of pace. Here’s a link to mine.

See you next week!
Faye
